How to view Check Disk (CHKDSK) results.
There are three main ways of viewing the results of your CHKDSK scan. Below are the three options
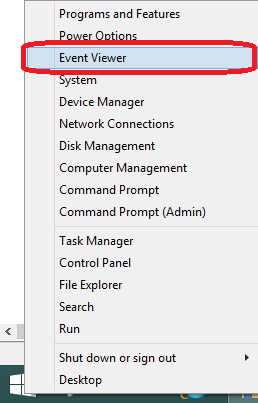
Right click on the :eightstart: button -> Click on Event Viewer.
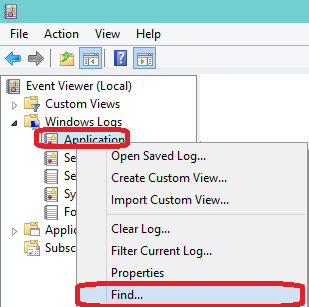
Inside Event Viewer look on the left menu and expand the folder Windows Logs -> Click on Application to load the events -> Right click on Application -> Select Find.
Type in chkdsk - > press Find next.

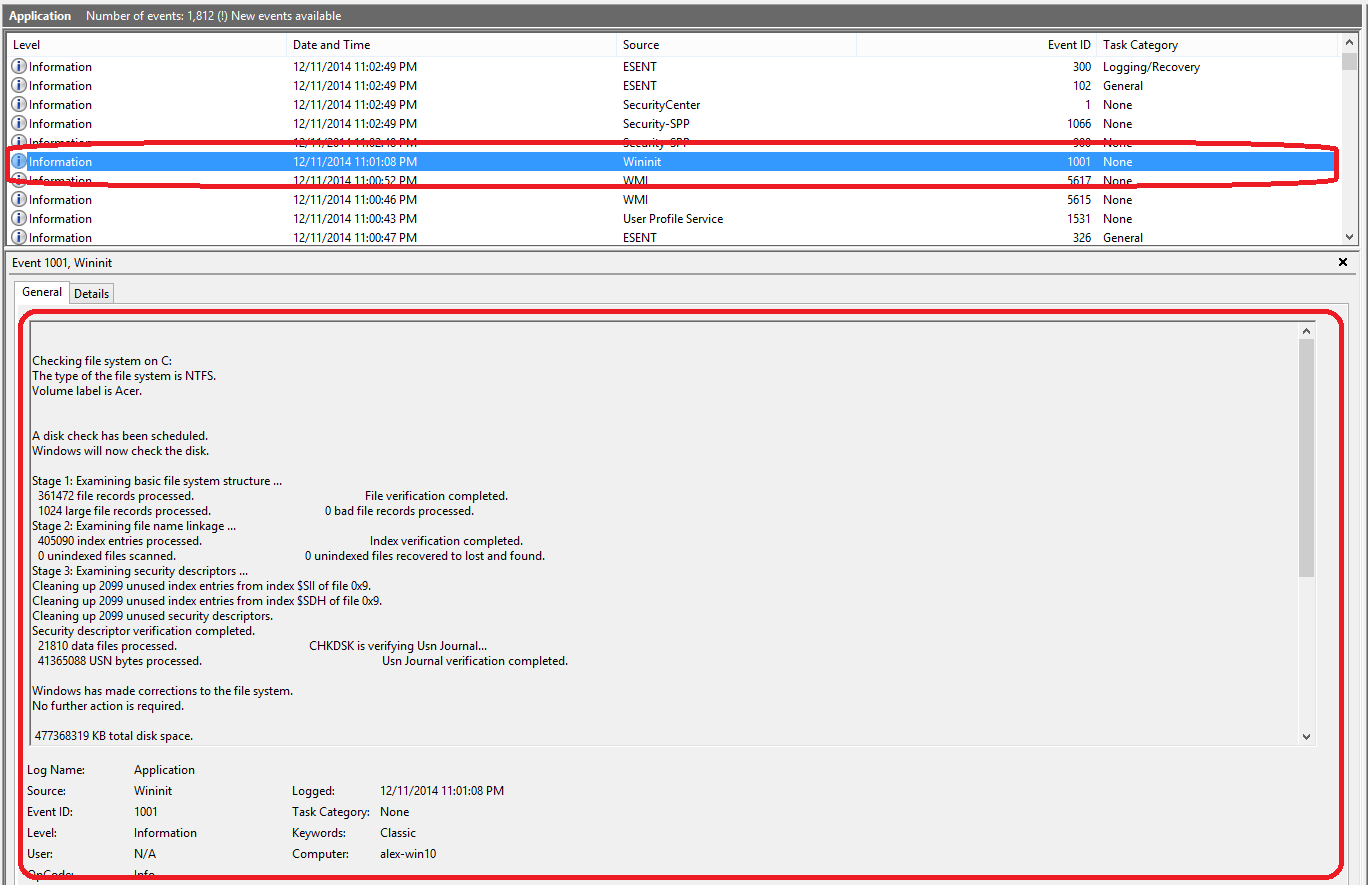
What will happen now is that the find function will do a search inside the event logs looking for the keyword chkdsk. Once the result is found look at the bottom half of the screen inside the General tab this has the results of the CHKDSK scan.
This powershell line will create a file on your desktop called CHKDSK_SCAN.txt. Exporting the file will make it easier to store the results for a future reference. This can also be used by System Administrators to collect records of the results for warranty purposes or for future reference.
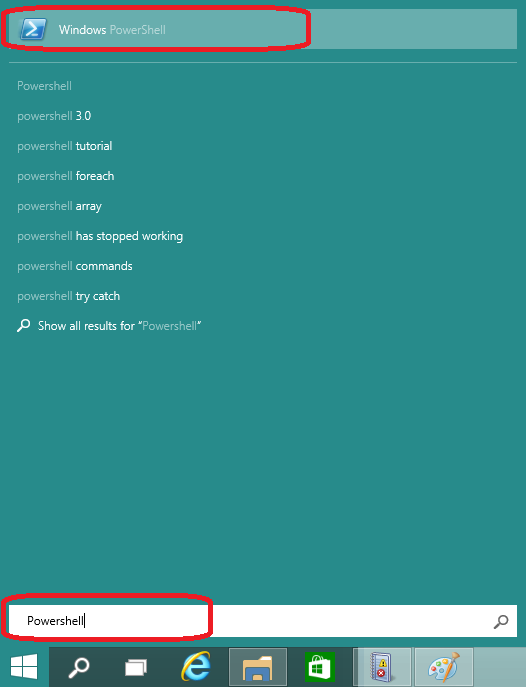
Click on Start -> Inside the search box type in Powershell -> Select Powershell.
Inside the Powershell console window please enter the following command:
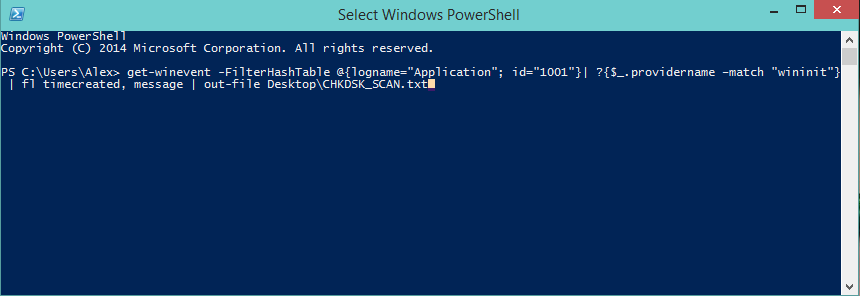
Go to your desktop and you should see a file called CHKDSK_SCAN.txt. All the results for your check disk scan will appear in this file.

Download ListChkdskResult.exe (by SleepyDude) from Here, save the file to your desktop. Once the file has been downloaded please go to your desktop and double click on ListChkdskResult.exe. This scan only takes a few seconds to run, once the scan is complete a pop-up will open with all the CHKDSK from the most recent scan plus any previous scans.
There are three main ways of viewing the results of your CHKDSK scan. Below are the three options
EventViewer
Right click on the :eightstart: button -> Click on Event Viewer.

Inside Event Viewer look on the left menu and expand the folder Windows Logs -> Click on Application to load the events -> Right click on Application -> Select Find.

Type in chkdsk - > press Find next.

What will happen now is that the find function will do a search inside the event logs looking for the keyword chkdsk. Once the result is found look at the bottom half of the screen inside the General tab this has the results of the CHKDSK scan.

PowerShell
This powershell line will create a file on your desktop called CHKDSK_SCAN.txt. Exporting the file will make it easier to store the results for a future reference. This can also be used by System Administrators to collect records of the results for warranty purposes or for future reference.
Click on Start -> Inside the search box type in Powershell -> Select Powershell.

Inside the Powershell console window please enter the following command:
Code:
get-winevent -FilterHashTable @{logname="Application"; id="1001"}| ?{$_.providername –match "wininit"} | fl timecreated, message | out-file "$env:userprofile\Desktop\CHKDSK_SCAN.txt"
Go to your desktop and you should see a file called CHKDSK_SCAN.txt. All the results for your check disk scan will appear in this file.

ListChkdskResult (Automatic tool)
Download ListChkdskResult.exe (by SleepyDude) from Here, save the file to your desktop. Once the file has been downloaded please go to your desktop and double click on ListChkdskResult.exe. This scan only takes a few seconds to run, once the scan is complete a pop-up will open with all the CHKDSK from the most recent scan plus any previous scans.
Last edited by a moderator:
