Access the Windows Recovery Options
Access the Windows Recovery Environment from the Advanced Boot Options:
Access the Windows Recovery Environment from Windows Installation Media:
Access the Windows Recovery Environment from the Advanced Boot Options:
- Press F8 every second or every half second when your system first turns on or restarts. Some BIOS systems may not recognize the F8 being pressed unless it is pressed very rapidly. Others require the F8 key to be pressed with a longer interval in between. You may have to try different methods of pressing F8 after the Power On Self Test (POST) screen in order to reach the Advanced Boot Options screen. For reference: the POST screen generally has the name of your motherboard (ASUS, Gigabyte, MSI, etc.) or the name of your system's manufacturer (HP, DELL, Toshiba, etc.) as an image/logo or in text as it proceeds through the test, and it appears just prior to seeing the Windows logo for the Windows loading process.
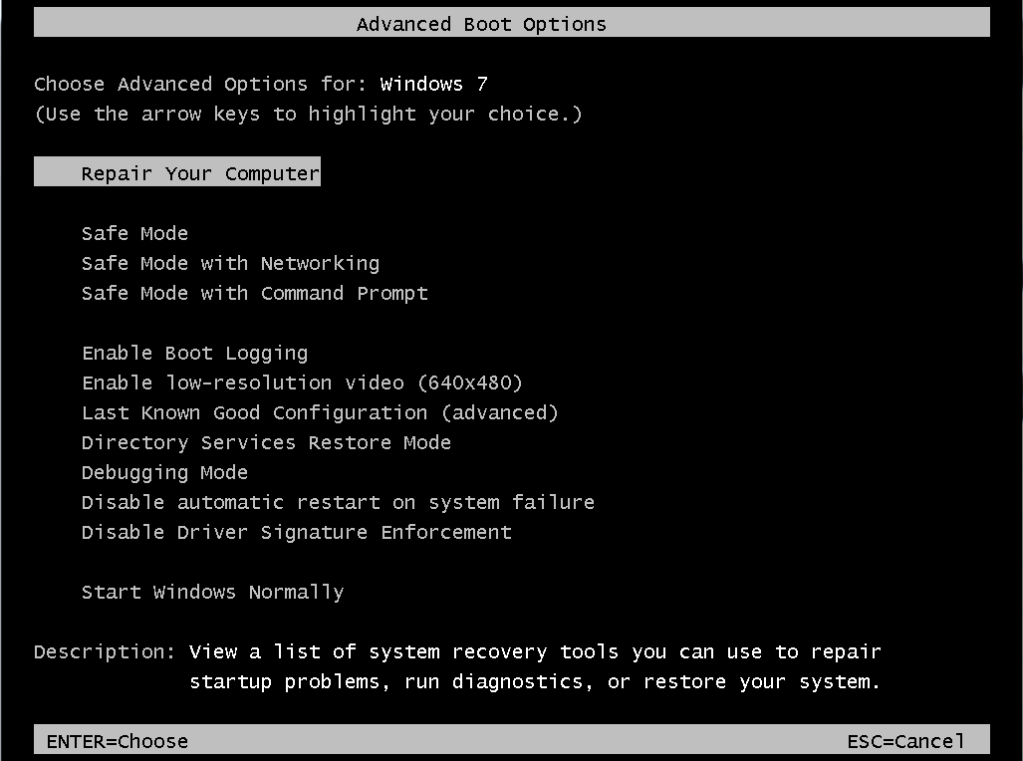
InfoIf you are unable to reach the Advanced Boot Options screen, proceed to the Access the Windows Recovery Environment from Windows Installation Media section.
- Once you have the Advanced Boot Options available, choose Repair Your Computer if it is available.
InfoRepair Your Computer will only be available if it has been installed on your hard disk.
- You'll see a screen that says Windows is loading files...; this may take a few minutes depending on the speed of your hard drive and RAM.
- Select your keyboard and login to your administrative user.
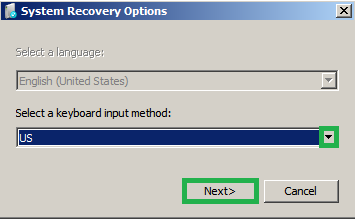

- You should now see the Windows Recovery Options screen.
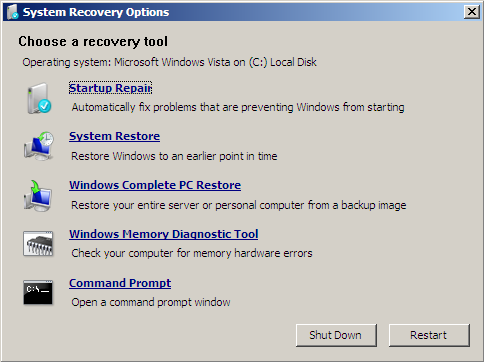
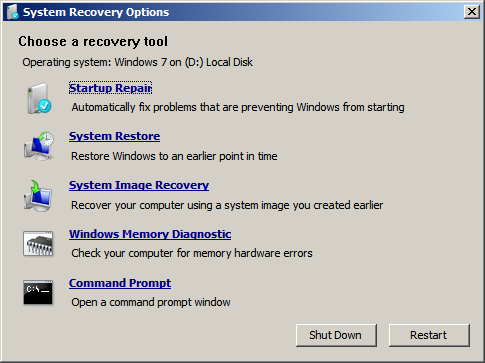
Access the Windows Recovery Environment from Windows Installation Media:
- Insert the Windows Installation Media and restart your system.
- Before you can use the installation media, configure your BIOS for the proper boot order. The installation media should be the first option in the boot menu, i.e. your CD/DVD drive or USB drive.
- Refer to your system manual for steps to enter the BIOS and change boot order settings. Most system manuals can be found online through the system manufacturer (Dell, HP, etc.) or motherboard manufacturer (Gigabyte, ASUS, etc.).
- If you cannot find your installation media, please contact your system manufacturer (Dell, HP, etc.) to replace missing recovery discs or contact Microsoft to replace a missing retail copy. If you were not provided with installation media, you may need to purchase a retail copy from an online or local store.
- Before you can use the installation media, configure your BIOS for the proper boot order. The installation media should be the first option in the boot menu, i.e. your CD/DVD drive or USB drive.
- Press a key when given the message to Press any key to boot from CD or DVD...
- You'll see a screen that says Windows is loading files...; this may take a few minutes depending on the speed of your DVD drive or USB drive.
- Choose your installation options and click Next.
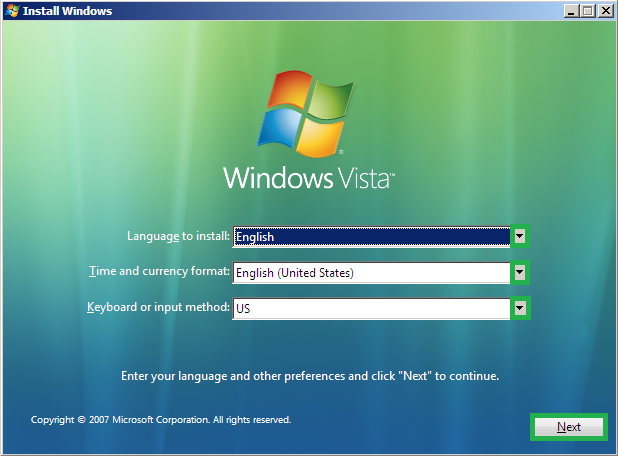
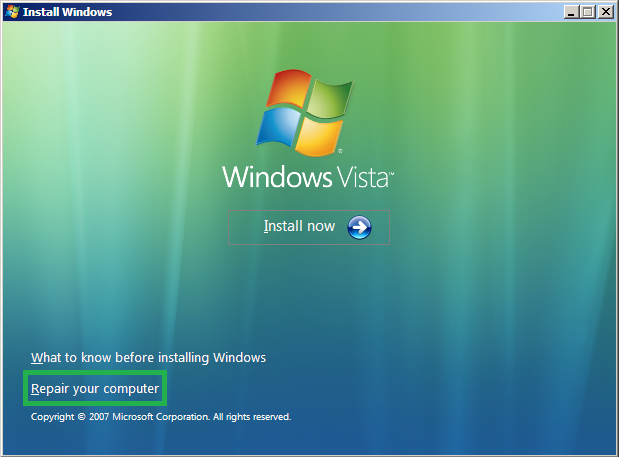
- Choose Repair your computer.
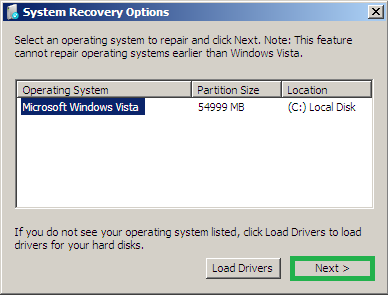
- Select the Windows installation to proceed to repair. Click Next >.
- At this point, you may receive a message that Windows is Searching for problems... Hit Cancel at this time.
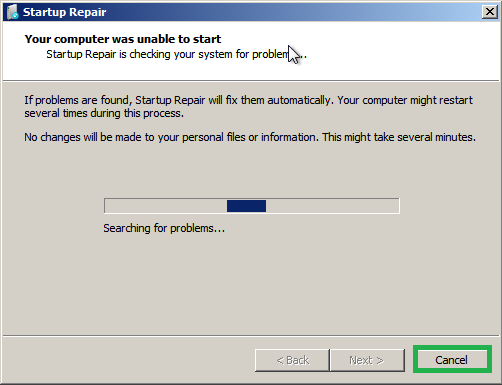
- When asked if you are sure you want to cancel the repairs, click Yes.
- Click Cancel one more time to reach the Windows Recovery Options screen.


Last edited by a moderator:
