Use System Restore to Restore to an Earlier System State (Windows 7 / Vista)
If You Can Boot Windows:
If You Cannot Boot Windows:
Steps for System Restore:
If You Can Boot Windows:
- Save your work and backup your important files. System Restore will restart your computer without giving you the option to save your work.
InfoSystem Restore will leave your data and files intact, but it is still a good idea to backup important files in case the unforeseen occurs.
- Click Start.
- Type System Restore in Search programs and files, and then hit Enter.
- If you receive a UAC dialog, type your administrator password or click Yes to continue.
If You Cannot Boot Windows:
Access the Windows Recovery Options to choose System Restore from the available options.
Steps for System Restore:
- After completing the above steps, you will see one of two screens:
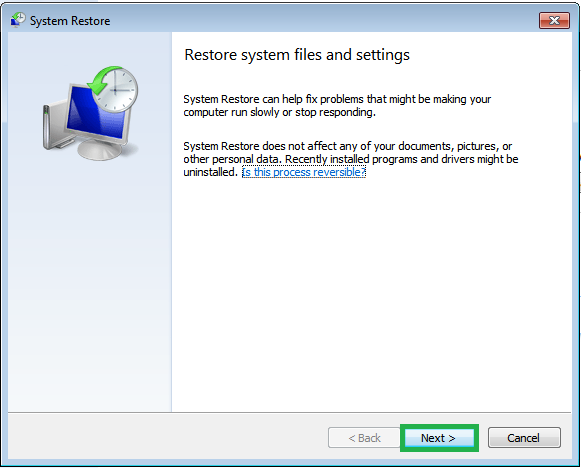
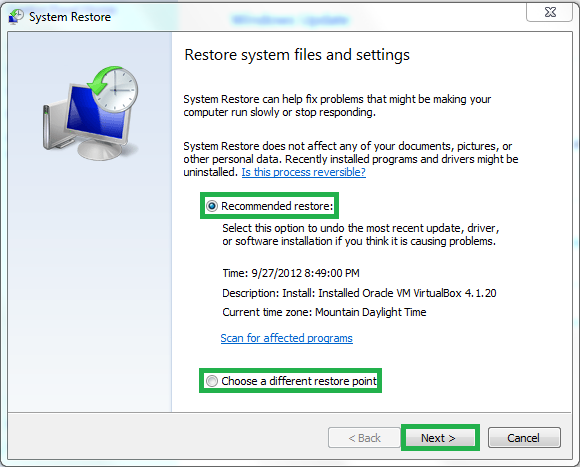
- For the first screen, click Next >.
- For the second screen, choose Recommended restore: or Choose a different restore point. Then click Next >.
- For the first screen, click Next >.
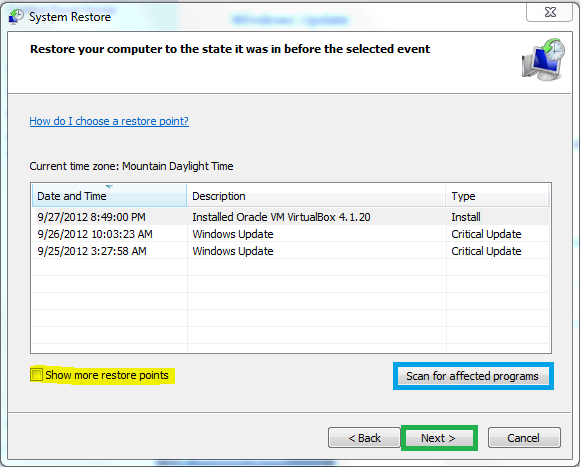
- If you hit Next > on the first screen or selected Choose a different restore point on the second screen, you will be met with the following screen. You will have the option to choose from multiple restore points. If you need to restore to an earlier point in time than one listed in the window, choose Show more restore points. You can also Scan for affected programs to determine which programs might have updates removed or which programs might be entirely removed.
Once you have selected a restore point, click Next >.
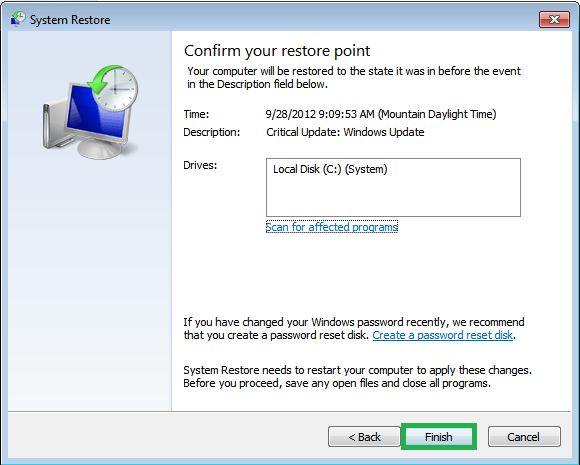
- On the following screen, click Finish.
- If you are absolutely sure the chosen restore point is the one you want, click Yes.
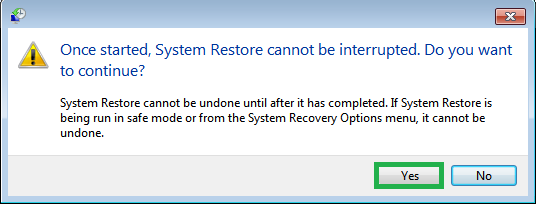
- You will then receive a message Preparing to restore your system... and the restore should complete without a problem.
InfoThe restore process may take some time depending on the changes made to the system since the previous restore point.
Last edited:
