[SOLVED] Defrag can't run on my computer

Joined
Nov 5, 2023
Posts
11
I stepped away from my computer and came back to find it updating itself without my permission. When it finished, I selected the option to run in Windows 10 because I don't currently want to run in Windows 11. I've been having high defragmentation issues recently so I went to check and see if the update would require me to defrag it, but I got a message saying that this app can't run on my computer. I checked online for some possible fixes, which lead me to DISM and scannow, but neither of them worked. I got error message 87 with DISM and scannow said it couldn't start the repair service. I also noticed that I'm getting a script error with a library not existing.

Also attaching the CBS and the components scanner results for more help.
 

Attachments

To open an elevated command prompt as these must be ran in an elevated prompt.

Hit Start, type cmd, then CTRL+SHIFT+ENTER. An elevated prompt should open.

Copy and paste this exactly DISM /Online /Cleanup-Image /RestoreHealth

and hit Enter. Let it complete.

In the same prompt type sfc /scannow and enter.

Report back what happens with each.
 
I've been having high defragmentation issues recently so I went to check and see if the update would require me to defrag it, but I got a message saying that this app can't run on my computer.

Have you used a 3rd party tool to defragment the disk?
 
Error 87 in DISM is typically a permissions issue. Make sure to open the command-line window (e.g. PowerShell) with admin rights.

To open a command-line window with admin rights, do the following:

  1. Press the Windows + X keys to open the Quick Links menu
  2. Select Windows PowerShell (Admin) or Windows Terminal (Admin)
  3. Answer Yes when prompted.
  4. Run DISM and then SFC as described above (Defrag can't run on my computer)
 
To open an elevated command prompt as these must be ran in an elevated prompt.

Hit Start, type cmd, then CTRL+SHIFT+ENTER. An elevated prompt should open.

Copy and paste this exactly DISM /Online /Cleanup-Image /RestoreHealth

and hit Enter. Let it complete.

In the same prompt type sfc /scannow and enter.

Report back what happens with each.
DISM gave me error 126: The specific module cannot be found.

For sfc/scannow : Windows Resource Protection could not start the repair service.
 
Hi,

Please do the following first to get some more information about the current Servicing Stack version.

Download the
577bf0efb8088-FRST.png
Farbar Recovery Scan Tool and save it to your Desktop:

Download the 64 bit version: - Farbar Recovery Scan Tool Link

  • Download the attachment fixlist.txt and save it to your desktop.
  • Right-click on FRST.exe and select "Run as administrator".
  • Press the Fix button.
  • If for some reason the tool needs a restart, please make sure you let the system restart normally.
  • When finished, a log called Fixlog.txt will appear in the same directory the tool is run from.
  • Post the logfile Fixlog.txt as attachment in your next reply.
 

Attachments

Hi,

Please do the following first to get some more information about the current Servicing Stack version.

Download the
577bf0efb8088-FRST.png
Farbar Recovery Scan Tool and save it to your Desktop:

Download the 64 bit version: - Farbar Recovery Scan Tool Link

  • Download the attachment fixlist.txt and save it to your desktop.
  • Right-click on FRST.exe and select "Run as administrator".
  • Press the Fix button.
  • If for some reason the tool needs a restart, please make sure you let the system restart normally.
  • When finished, a log called Fixlog.txt will appear in the same directory the tool is run from.
  • Post the logfile Fixlog.txt as attachment in your next reply.

Okay, I have done everything you asked.
 

Attachments

Hi,

Step 1. Download
6530fbb0f4101-56f31e53c97da-SFCFix.PNG
SFCFix and save it to your desktop.

Warning: This fix was written specifically for this system. Do not run this fix on another system.
  • Save any work you have open, and close all programs.
  • Download the attachment SFCFix.zip and save it to your desktop.
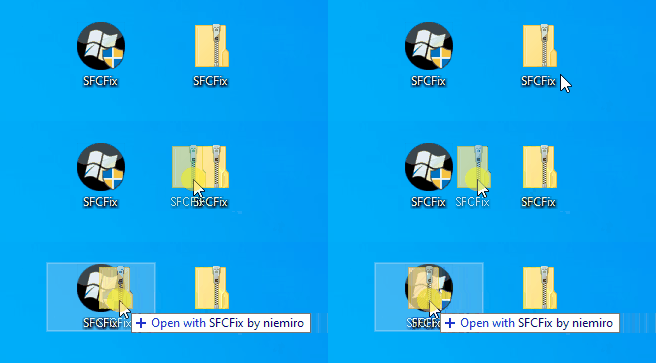
  • Drag the SFCFix.zip file over the SFCFix.exe executable and release it.
650c22f99662d-6190d993a26f3-SFCFix-Zip-Eng.gif

  • SFCFix will launch, let it complete.
  • Once done, a file will appear on your desktop, called SFCFix.txt.
  • Post the logfile (SFCFix.txt) as attachment in your next reply.


Step 2. Run the following DISM command and post the result. If it fails attach a new copy of the CBS log.
Code:
DISM /online /cleanup-image /RestoreHealth
Here is the SFCFix text that appeared. I think the DISM failed too, though it got started this time at least. I'm attaching the DSM log as well as the new CBS log.

I did notice that the first part of the SFCFix failed when I tried to run it. The rest was fine, but not part 1. Hope that helps!
 

Attachments

The fix completed succesfully, and you can ignore the error reported by SFCFix.

Here's the next fix.

Step 1.
Warning: This fix was written specifically for this system. Do not run this fix on another system.
  • Save any work you have open, and close all programs.
  • Download the attachment SFCFix.zip and save it to your desktop.
  • Drag the SFCFix.zip file over the SFCFix.exe executable and release it.
650c22f99662d-6190d993a26f3-SFCFix-Zip-Eng.gif

  • SFCFix will launch, let it complete.
  • Once done, a file will appear on your desktop, called SFCFix.txt.
  • Post the logfile (SFCFix.txt) as attachment in your next reply.


Step 2. Run the following DISM command and post the result. If it fails attach a new copy of the CBS log.
Code:
DISM /online /cleanup-image /RestoreHealth
DISM completed successfully. SFCFix is attached below. But Defrag still isn't working.
 

Attachments

Rich (BB code):
2023-11-11 12:26:31, Info                  CSI    00000289 Hashes for file member [l:10]'dfrgui.exe' do not match.
 Expected: {l:32 ml:33 b:b2bfb992f15caf8c05c9438f70d1e975ca70ca7179119c7d2a97def0caf78ee3}.
 Actual: {l:33 ml:4096 b:d34d34d34d34d34d34d34d34d34d34d34d34d34d34d34d34d34d34d34d34d34d34}.
2023-11-11 12:26:31, Info                  CSI    0000028a [SR] Repairing file \??\C:\WINDOWS\System32\\dfrgui.exe from store

Hi,

Great, the payload file of Windows Defrag is restored using SFC this run. Can you please run ComponentsScanner again.

Download
61f7aba7309a1-ComponentsScanner_Icon.png
ComponentsScanner and save it to your desktop.
  • Right-click ComponentsScanner.exe and select "Run as administrator", click Yes on the UAC (User Account Control) prompt which appears.
  • Follow the on-screen instructions.
  • Once complete, a report will be saved to your desktop called ComponentsScanner.txt.
  • Post the logfile ComponentsScanner.txt as attachment into your next reply.

Here is the log.
 

Attachments

This looks good, no important warnings are reported! So if everything is up and running we can mark this thread as solved...
 
Back
Top