Macrium Reflect is no longer free. It's now a 30-day Trial. They will continue updates until January 1, 2024.
How to install it:
Create the rescue media:
Create a full image of your system:

You will choose the drive and partitions you want to image. Then, click Create an image of the partition(s) required to backup and restore Windows.

Make sure each partition you want to image is checked like above. Some of the partitions contain the boot files for Windows. Choose the location of the image file, preferably a separate or external drive.
You can name the image if you wish. Hit Next

You can add a schedule. As shown above, I have 2 Full backups and 12 Differentials, you can set it up any way that fits your needs. Explanation of Full, Differential backups: Incremental vs differential backup: what are the differences, and how do they compare?

Scheduling is self-explanatory.

This is your summary to check if all is well and to your specifications. You can also hit the advanced options and choose the option to verify the backup image before or after every run of the backup schedule.

This is it! You can run the backup you created now or uncheck that and let it run on the schedule you created.
What happens if you want (or need) to exclude files from your image?
The following is a tutorial to get you started utilizing the quite easy and full-featured backup program, Macrium Reflect Free 30-Day Trial
I have many years of positive experience with Macrium at work and home on multiple computers with a wide variety of configurations.
How to install it:
Read More:
Click here to download.

After downloading the file and clicking the executable, follow all the prompts on your screen. Make the choices that fit your needs.
Choose Home Use and download it to the desired folder. You can execute the program within the browser.
Since this tutorial is for the Home version, choose Home and click next.
It will automatically populate the license key.
If it appears. I always uncheck the register box and click next. It’s up to you if you want to register or not, it does not change the functionality of the software.
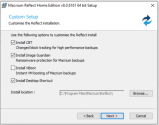
Leave all checks default and click next.

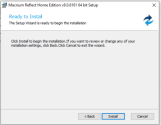
Finally, click install.


After downloading the file and clicking the executable, follow all the prompts on your screen. Make the choices that fit your needs.
Choose Home Use and download it to the desired folder. You can execute the program within the browser.
Since this tutorial is for the Home version, choose Home and click next.
It will automatically populate the license key.
If it appears. I always uncheck the register box and click next. It’s up to you if you want to register or not, it does not change the functionality of the software.
Leave all checks default and click next.

Finally, click install.

Read More:
- Supports Windows 11/10/8/7, Vista, and XP. Also, you can choose what version of Windows PE you want to download at the next screen with the change PE Button.
- Insert a USB stick into the PC you're creating the rescue media on.
- From the Backup tab of the task pane, below Other Tasks, click Create bootable Rescue media.

- Click Next, and you'll see the following as Macrium checks for Device Drivers compatibility. If you need to add Drivers, this is where you choose to do so.

- Click Next to prepare and build the Windows PE image.

You can leave this at default or choose your own WIM. - Click Next to begin the WIM build. Files will automatically be downloaded from Microsoft to complete the process if needed.
- Once complete you can choose where to burn the media
You can choose either CD/DVD or USB. I recommend USB.

- Click Finish to create your rescue media
Once you have your media created, it's wise to test it to make sure it will boot on your PC.
Read More:

You will choose the drive and partitions you want to image. Then, click Create an image of the partition(s) required to backup and restore Windows.

Make sure each partition you want to image is checked like above. Some of the partitions contain the boot files for Windows. Choose the location of the image file, preferably a separate or external drive.
You can name the image if you wish. Hit Next

You can add a schedule. As shown above, I have 2 Full backups and 12 Differentials, you can set it up any way that fits your needs. Explanation of Full, Differential backups: Incremental vs differential backup: what are the differences, and how do they compare?

Scheduling is self-explanatory.

This is your summary to check if all is well and to your specifications. You can also hit the advanced options and choose the option to verify the backup image before or after every run of the backup schedule.

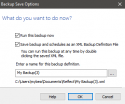
This is it! You can run the backup you created now or uncheck that and let it run on the schedule you created.
Read More:
Check macrium knowledge base: Macrium KnowledgeBase v7.2 - how to exclude files from Disk Images and Clones (click)
In short:
Warning
Use caution when editing the registry, especially if you do not know what you are doing or without specific guidance from someone who is trained in manipulating the registry
In short:
- Open regedit and navigate to:
Code:
Computer\HKEY_LOCAL_MACHINE\SYSTEM\CurrentControlSet\Control\BackupRestore\FilesNotToSnapshotMacriumImage - It should already contain this multi-string (don't remove it):
Code:Multi-string value name: RestorePoints data: $AllVolumes$\System Volume Information\*{3808876B-C176-4e48-B7AE-04046E6CC752} /s - Add a new multi-string value, name it like you desire, fill it with the paths or files you want to exclude.
Example:
I have some films in c:\films, and I want to exclude them from the image (because it will be bigger otherwise).
I added:Code:Multi-string value name: film data: %SystemDrive%\film\*.* /s

Be careful with system variables: given that the parameter /s is present, windows/macrium will search and exclude all \film folders (and the files inside them) in %systemdrive%.
If you want to exclude c:\film\*.*, it will be simpler to use that one.
One caveat that was brought to my attention by one of our experts here at Sysnative: Macrium, in some instances, breaks Windows Update in a way that prevents Windows Upgrade from completing successfully by modifying the ImagePath value of the WIMMount key. The fix for this would be to change the Image Path back to the default.
Attachments
Last edited:


